As an Amazon Associate, we earn from qualifying purchases. Some links may be affiliate links at no extra cost to you. Although our opinions are based on curated research, we haven't used these products. Articles generated with AI.

How Do I Bleed Car Brakes Properly?
To bleed car brakes properly, let’s gather our tools: a box-end wrench, clear tubing, and brake fluid. We start with the right rear wheel, pumping the brake pedal and loosening the bleeder screw to release fluid while watching for air bubbles. Remember to keep the brake fluid reservoir topped up! After we’ve bled all wheels in order, we’ll test the brakes for firmness. Stick with us, and we’ll explore more tips and techniques!
Key Takeaways
- Gather necessary tools: box-end wrench, clear plastic tubing, and fresh brake fluid (DOT3 or DOT4) for an efficient bleeding process.
- Follow the correct bleeding order: right rear, left rear, right front, left front to avoid air pockets.
- Pump the brake pedal, hold it down, then loosen the bleeder screw to release fluid until clear fluid flows without air bubbles.
- Maintain the brake fluid reservoir above minimum level during the process to prevent air re-entry into the system.
- Ensure safety by using sturdy jack stands, wearing safety glasses and gloves, and working in a well-ventilated area.
Preparation and Tools Needed for Brake Bleeding
You may be interested


Before we plunge into the nitty-gritty of bleeding our car’s brakes, let’s gather everything we need to get started. First, we’ll require a suitable box-end wrench for those bleeder screws—tool compatibility matters here to avoid damage. Next, let’s grab some clear plastic tubing to detect those pesky air bubbles while directing brake fluid into our collection container. Speaking of brake fluid, we’ll need the right type, typically DOT3 or DOT4, around 500ml for a partial bleed. It’s wise to have penetrating oil on hand, too, to clean rusted screws. And don’t forget safety gloves—brake fluid can be quite corrosive! Additionally, ensure your brake booster is in good condition to maintain optimal braking performance during the process.
Takeaway: Gather the right tools, fluids, and prepare your workspace for a smooth bleeding process!
Understanding Brake Bleeding Order
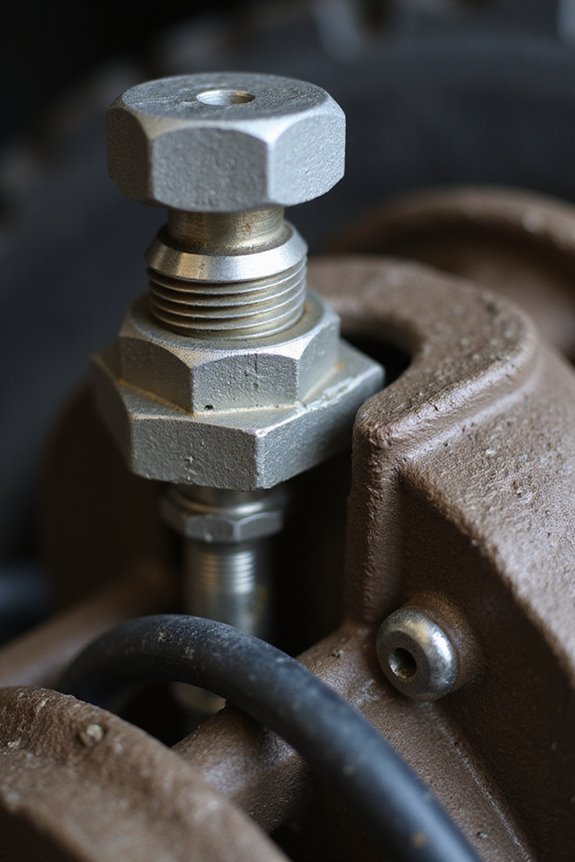
When it comes to bleeding our car’s brakes, we can often forget that there’s a specific order to follow, one that plays an essential role in guaranteeing our braking system functions at its best. Generally, we start with the brake farthest from the master cylinder, which means the traditional order goes: right rear, left rear, right front, then left front. This guarantees we’re using effective bleeding techniques to remove air completely.
However, vehicles with ABS or unique configurations may require different sequences. So, it’s wise to check our manufacturer’s manual for guidance. A correct bleeding order not only prevents air pockets but also keeps our brake fluid fresh—resulting in a firmer brake pedal and better responsiveness. Additionally, using a brake bleeder kit can simplify the process and enhance efficiency. Let’s keep our brakes safe!
Step-by-Step Process for Bleeding Brakes
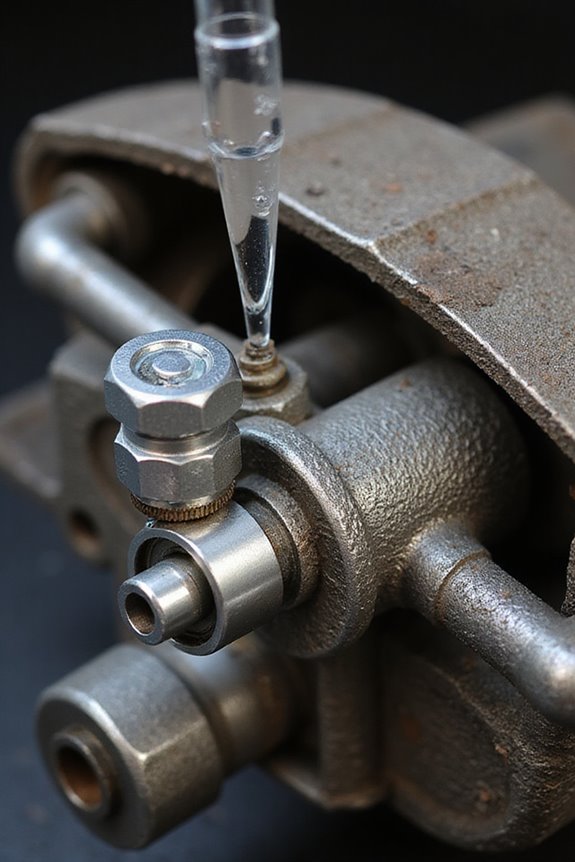
Bleeding brakes properly is a crucial step in maintaining our vehicle’s safety and performance, and fortunately, it can be done with just a few straightforward steps. First, gather our tools: a box-end wrench, clear plastic tubing, and fresh brake fluid. As brake maintenance tips suggest, we should use the correct bleeding order, starting from the wheel farthest from the master cylinder.
Next, we’ll pump the brake pedal, hold it down, then loosen the bleeder screw to release fluid and air bubbles. Avoid common bleeding mistakes, like not keeping an eye on the fluid level. Additionally, using a quality brake bleeding kit can simplify the process and improve efficiency. Repeat this process until we see clear fluid. Finally, check the pedal firmness. With care, we can guarantee our brakes stay in top shape!
Managing Air and Fluid Levels During Bleeding

Managing air and fluid levels during the brake bleeding process is almost like dancing—we have to keep our steps in sync to avoid stepping on toes, or in this case, letting air spoil the party.
Fluid Level Maintenance
Let’s always keep the brake fluid reservoir above the minimum level. It’s vital to avoid air sneaking back into the system. We should check the fluid frequently and verify we’re using the right type of fluid to prevent contamination. In addition, ensuring compatibility with your vehicle’s specifications is crucial for optimal brake performance.
Air Bubble Management
As we bleed, we’ll keep an eye out for air bubbles. Clear tubing helps us see those pesky bubbles, and applying grease around the bleed screw can minimize air seepage.
Takeaway: Keep fluid checked, watch for bubbles, and close that screw fast! We’re in this together!
Testing Brakes Post-Bleeding
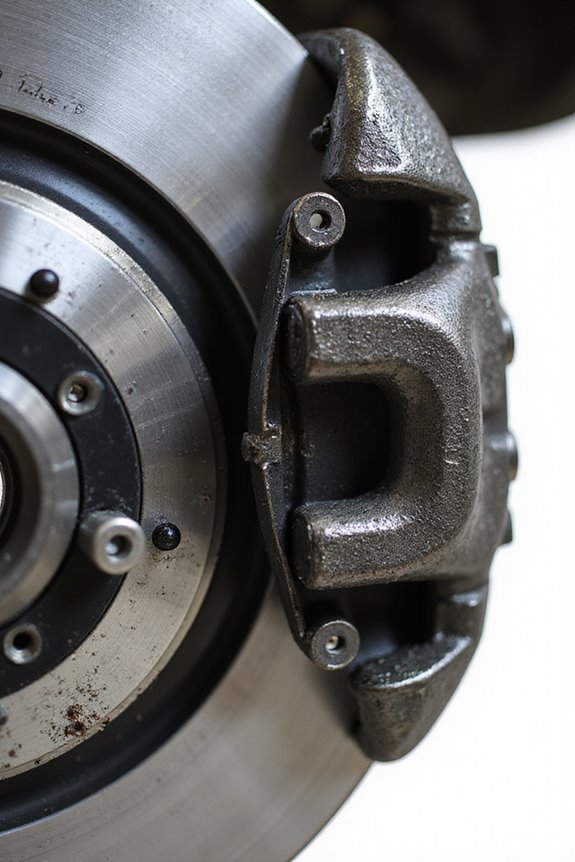
Testing our brakes after bleeding is essential to guarantee everything’s running smoothly—after all, we want to stop when we need to! First, let’s check our pedal feel. It should feel firm, not spongy or soft; a steady pedal means we’ve likely removed all those pesky air bubbles. Next, if we feel any sinking or mushiness, that’s a red flag for air or leaks.
Let’s also do a quick visual inspection for any signs of leaks at the bleeder screw and connections. Finally, we can put our brakes to the test. In a safe area, let’s see how they respond. Look for consistent behavior, no warning lights, and no strange noises. It’s also important to consider the seasonal conditions that can affect the performance of your brakes, as certain designs are optimized for various weather scenarios. Happy testing!
Takeaway: A firm pedal and good responsiveness indicate successful bleeding.
Frequency and Indicators for Bleeding Brakes
Now that we’ve confirmed our brakes are functioning properly, it’s a good time to talk about how often we need to bleed those brakes and what signs indicate it’s time for a little maintenance.
Typically, we should consider bleeding our brakes every 1-2 years, or 2-3 years under normal driving conditions. For those of us who enjoy high-performance driving, bleeding frequency can jump to after every event or even track session.
We should watch out for performance indicators like a spongy brake pedal, longer stopping distances, or discolored brake fluid. If we notice any of these signs, it’s definitely time for some brake maintenance. Keeping an eye on our brakes not only guarantees our safety but also enhances our driving experience! Regular brake maintenance, like replacing ignition coils, can significantly improve vehicle performance and safety.
Safety Precautions and Best Practices
When it comes to bleeding car brakes, safety should always be our top priority. To guarantee a secure process, let’s remember a few essentials. First, always use sturdy jack stands and wheel chocks; we don’t want our vehicle shifting unexpectedly. Next, let’s gear up with safety glasses and chemical-resistant gloves—brake fluid toxicity isn’t a joke!
While working, maintain good ventilation to minimize hazardous fumes. We should also be mindful about which brake fluid we’re using; sticking to the manufacturer’s specifications helps prevent costly damage. Finally, let’s keep our workspace clean—spilled fluid can harm paint and components.
Takeaway: Safety gear on, vehicle secured, and proper materials in hand—let’s tackle this task with confidence!
Disposal of Old Brake Fluid and Cleaning Tips
It’s important to remember that proper disposal of old brake fluid isn’t just a matter of convenience; it’s an essential step in keeping our environment safe. Since brake fluid is classified as hazardous waste, we shouldn’t pour it down drains or toss it on the ground. Instead, let’s seal it in leak-proof containers and take it to designated disposal facilities. A little research can go a long way—check local government websites for nearby sites that accept it.
For spills, we can use cat litter to absorb the fluid, avoiding soil contamination. Once absorbed, let it dry, and dispose of it according to local regulations. Remember, our care in disposing prevents harmful environmental impact!
Frequently Asked Questions
Can I Bleed Brakes Alone Without an Assistant?
Absolutely, we can bleed brakes alone without an assistant! With a trusty vacuum pump and some brake fluid, we’ll conquer the task together. It just takes a bit of patience and a confident approach!
What Tools Are Essential for Bleeding Brakes?
To bleed brakes effectively, we need brake fluid, a box-end wrench, clear tubing for fluid collection, and a catch container. Using the right bleeding technique guarantees a safe, smooth experience every time. Let’s do this together!
How Do I Know if My Brake Fluid Is Contaminated?
Like a detective, we can spot contamination indicators in our brake fluid, such as discoloration, leaks, and a spongy pedal. By staying vigilant, we keep our braking system safe and responsive, assuring our journey remains smooth.
Is It Safe to Mix Different Types of Brake Fluid?
No, it’s not safe to mix different brake fluid types. We must guarantee brake fluid compatibility, as mixing can lead to serious damage. Let’s stick to what our vehicle manufacturer recommends for safety and performance.
What Should I Do if My Bleeder Screw Breaks?
If our bleeder screw breaks, we should stop trying to remove it and schedule a brake system inspection. A professional can assist with bleeder screw replacement, ensuring our braking safety isn’t compromised. Let’s prioritize safety together!