As an Amazon Associate, we earn from qualifying purchases. Some links may be affiliate links at no extra cost to you. Although our opinions are based on curated research, we haven't used these products. Articles generated with AI.

How Do I Apply Ceramic Coating To My Car?
Applying ceramic coating to our car is a meticulous process that starts with thorough surface preparation. First, we wash the vehicle to remove old wax, then use a clay bar to tackle any contaminants. Next, the environment matters—aim for 72°F and 40-60% humidity for best adhesion. We then apply the coating in sections, guaranteeing it cures properly over 24-48 hours to avoid peeling. Stick around, and we’ll share more tips to guarantee your coating shines!
Key Takeaways
- Thoroughly wash your car with wax-free soap, then use a clay bar to remove surface contaminants before application.
- Ensure the environment is at 50°F to 80°F with 40% to 60% humidity for optimal adhesion.
- Apply the ceramic coating in smooth, overlapping strokes, starting from the top and working downwards in sections.
- Allow the coating to flash until it appears dull before buffing with a microfiber towel to avoid streaks.
- Allow the coating to cure for 24 to 48 hours, with complete chemical processes taking up to 2-3 weeks.
Surface Preparation Steps
You may be interested


When preparing our car for ceramic coating, we can think of it as laying a perfect foundation for a house—every step counts. First, we need to give our car a thorough wash with a wax-free soap, guaranteeing we completely remove any old waxes and residues. Next, let’s use a clay bar to tackle those pesky microscopic surface contaminants; it’s vital for a perfect finish. After that, polishing is essential to eliminate swirl marks and scratches. Finally, we should follow up with a panel wipe or surface prep product to make certain no oils or residues interfere with adhesion. Remember, a pristine surface isn’t just nice to look at—it’s key to achieving a long-lasting ceramic coating. Additionally, proper surface preparation can significantly enhance the protective qualities of the ceramic coating.
Takeaway: Each step brings us closer to that stunning finish!
Ideal Environment for Application

Creating the perfect environment for applying ceramic coating is essential, and we can’t overlook the importance of temperature and humidity. Ideally, we want to be in a space where the ambient temperature is between 50°F and 80°F, with a sweet spot at 72°F to 74°F. This helps guarantee smooth application and proper curing. Plus, humidity management is key; aiming for 40% to 60% relative humidity will promote balanced adhesion.
So, let’s steer clear of extreme conditions. Too much humidity can lead to condensation—definitely a coating nightmare! And on the flip side, low humidity can cause cracks.
Additionally, working in an ideal environment for application can significantly improve the longevity and effectiveness of the ceramic coating.
Takeaway: Maintain temperature control and monitor humidity for the best results!
Application Process Overview
Before we plunge into the nitty-gritty of ceramic coating application, let’s take a moment to map out our approach. To kick things off, we’ll tackle surface preparation—washing, clay bar treatment, and paint correction guarantee we’re starting with a clean slate. Then, it’s all about mastering those application techniques. We’ll apply just a few drops of coating using smooth, overlapping strokes, working systematically from the top down.
Additionally, regular inspections of the coating will help maintain its longevity and effectiveness. And let’s not forget the ceramic benefits; this means we’re looking for improved shine and protection! Ultimately, our goal is to achieve that luscious, glossy finish we all crave. By dividing our vehicle into manageable sections, we’ll guarantee quality control, keeping each layer perfect before moving on. Ready? Let’s do this!
Understanding Flash Time and Buffing
While it might sound simple, mastering flash time and buffing is vital to achieving that flawless, glossy finish we all desire.
Flash time refers to the brief window when solvents evaporate, indicating our coating’s readiness for buffing. Picture it: a shiny surface transforming to a duller sheen. This tells us it’s time to act.
When buffing, use a microfiber towel, gently wiping away excess coating to avoid mishaps like streaks or high spots. Remember, we want a smooth finish! Timing is key; too long and it may bond too tight for easy removal.
Takeaway: Keep an eye on the clock and trust your eyes. Additionally, understanding charging time expectations is important because it can help you apply techniques with precise timing for the best outcome. Let’s tackle this together to achieve that stunning, protective layer!
Curing Process and Importance

After we’ve tackled the important aspects of flash time and buffing, let’s shift focus to another key phase of ceramic coating—curing. This step’s essential, as it directly affects the longevity and durability of the coating.
The curing timeline usually starts with an initial cure of 24 to 48 hours, allowing for solvent evaporation. Following that, complete chemical processes take several days to 2-3 weeks. Warmer, drier days can speed things up, while humidity can slow it down.
If we don’t give it a proper cure, we may face peeling or fading down the line. Remember, this layer is what’s gonna protect our beloved car from the elements! A faulty radiator cap can also contribute to overheating issues, which underlines the importance of reliable maintenance.
Takeaway: Patience here translates into a long-lasting shine.
Aftercare for the Coated Surface
When we’ve invested time and effort into ceramic coating our car, it only makes sense to follow up with proper aftercare to keep that stunning shine and protection intact.
Ceramic Maintenance Tips
- Wash by hand every 2 to 4 weeks using a pH-neutral car shampoo.
- Always use a soft wash mitt or microfiber cloth to avoid scratches.
Contaminant Protection
- Remove contaminants like bird droppings or sap promptly.
- Use a dedicated detail spray for quick clean-ups.
Aftercare Reminders
- Avoid automatic car washes – they can damage the coating!
- Dry with microfiber towels to prevent water spots.
Takeaway: Stay committed to your car’s care, and it’ll reward you with that gorgeous finish and lasting protection for years to come! Additionally, maintaining powerful suction from your car vacuum can help in removing debris that might otherwise harm the surface.
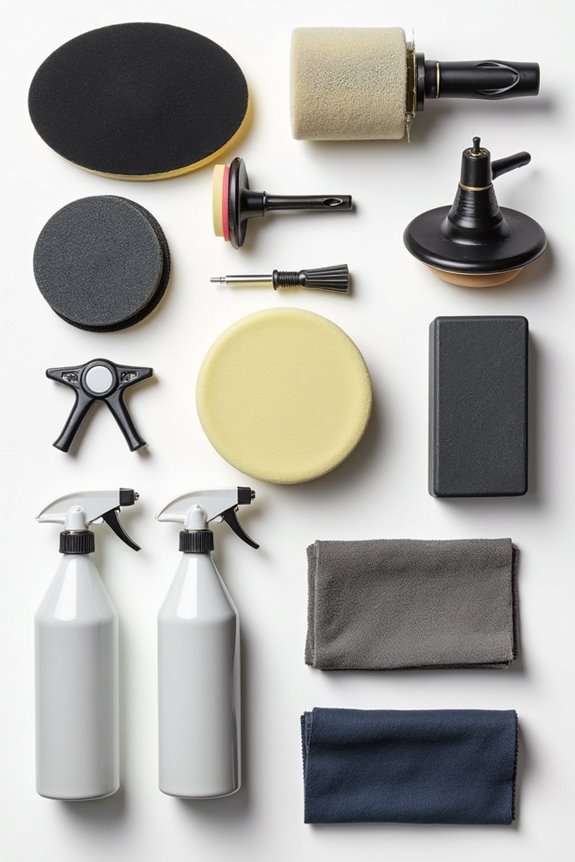
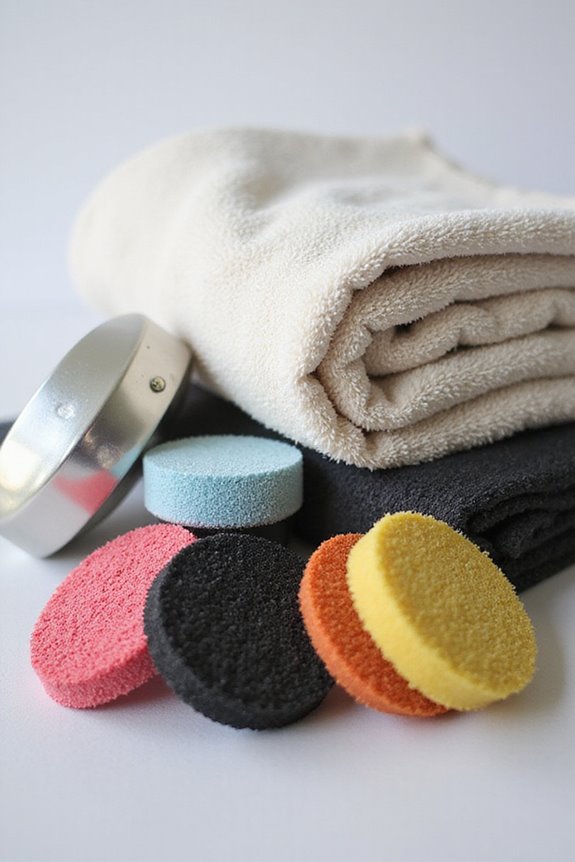
Essential Tools and Materials Needed
To get started on applying ceramic coating like a pro, we’ll need the right tools and materials at our disposal. Let’s make sure we gather everything to avoid application mistakes that could compromise those amazing ceramic coating benefits.
Preparation and Surface Cleaning Tools:
- Microfiber towels
- Clay bar
- Heavy-duty car wash soap
- Iron remover solution
- Panel prep solution
Application Tools:
- Ceramic coating applicator pads
- Nitrile gloves
- Eye protection glasses
Equipment for Paint Correction:
- Dual action polishing machine
- Polishing compounds
Essential Ceramic Coating Materials:
- Ceramic coating liquid
- Clear coat materials
Supporting Accessories:
- Rolling cart
- Detailing spray lubricants
Takeaway: Collecting these will set us up for a successful application!
Tips for Optimal Results
Achieving ideal results with your ceramic coating application is all about attention to detail and following the right steps. Here’s how we can avoid common mistakes together:
- Prep Matters: We can’t skip washing and decontaminating the surface to guarantee proper adhesion.
- Perfect Environment: Let’s work in a dry space, ideally between 65°F and 75°F, to maximize curing.
- Application Technique: Remember to apply in sections, using thin, overlapping layers for an even finish.
For typical questions, it’s essential to let the coating cure without water contact for at least a week.
Takeaway: Following these tips guarantees the longevity of our ceramic coating and maintains that beautiful shine for years to come.
Frequently Asked Questions
How Long Does Ceramic Coating Last on My Vehicle?
Ceramic coating can last between 2 to 5 years on our vehicles, often providing exceptional protection. However, premium applications sometimes stretch to 10 years, reminding us that care and quality impact durability considerably.
Can I Apply Ceramic Coating Myself or Hire a Professional?
We can definitely tackle DIY ceramic coating with careful prep and attention. However, professional services offer expertise and guarantees we might appreciate to guarantee a flawless finish. Ultimately, it’s about what we feel comfortable with.
What Happens if I Miss Spots During the Application?
If we miss spots during the application, it can lead to uneven protection and appearance. Spot correction’s essential, and using effective application techniques helps guarantee a consistent finish, maintaining our car’s beauty and longevity together.
Is Ceramic Coating Safe for All Vehicle Surfaces?
Ceramic coating isn’t a universal shield; while it dances beautifully with metal for paint protection, it can stumble on plastic and leather. Let’s embrace surface compatibility, ensuring every part gets the love it deserves.
Can Ceramic Coating Be Removed Once Applied?
Yes, we can remove ceramic coatings! Utilizing various removal techniques helps guarantee we maintain coating durability. Remember, careful polishing or specialized chemicals can effectively get rid of the old layer, preparing our surface beautifully for new applications.


