As an Amazon Associate, we earn from qualifying purchases. Some links may be affiliate links at no extra cost to you. Although our opinions are based on curated research, we haven't used these products. Articles generated with AI.
How Do I Change A Flat Tire Safely?
Changing a flat tire safely is essential for every driver. First, we should pull over to a flat area away from traffic, turn on our hazard lights, and apply the parking brake. Next, let’s gather our tools, like a car jack and spare tire. Once we confirm the surroundings are safe, we can loosen the lug nuts, remove the flat tire, and install the spare. Finally, we’ll tighten the lug nuts securely. Want to know more tips to handle unexpected roadside situations?
Key Takeaways
- Pull over to a flat, stable area away from traffic and turn on hazard lights for safety while changing the tire.
- Gather and organize essential tools like a car jack, spare tire, and lug wrench before starting the tire change.
- Assess the surrounding area for hazards, ensuring it’s safe to change the tire without risk of injury.
- Align the spare tire correctly with wheel studs and hand-tighten lug nuts before securing them with full torque.
- Regularly maintain tires and keep proper tools in your vehicle for preparedness in case of a flat tire.
Preparing the Vehicle and Safety Precautions
You may be interested


When you’re faced with a flat tire, the first thing we need to do is confirm we’re in a safe location to handle the situation. We should pull over to a flat, stable spot—preferably off the main road, like a parking lot. Avoid slopes or hills to guarantee vehicle stability. As we stop, let’s turn on our hazard lights to alert passing traffic—safety first!
Next, we’ll apply the parking brake and verify our vehicle is completely stopped and secure. Taking a moment to look around for nearby hazards is essential; we want to be mindful of anything that could affect our safety. And if we happen to have wheel chocks handy, let’s use those! They help prevent any rolling. Using chocks with a sufficient weight capacity is especially important to ensure reliability during this process.
Takeaway: Always prioritize safety, both for ourselves and other road users.
Gathering Tools and Equipment

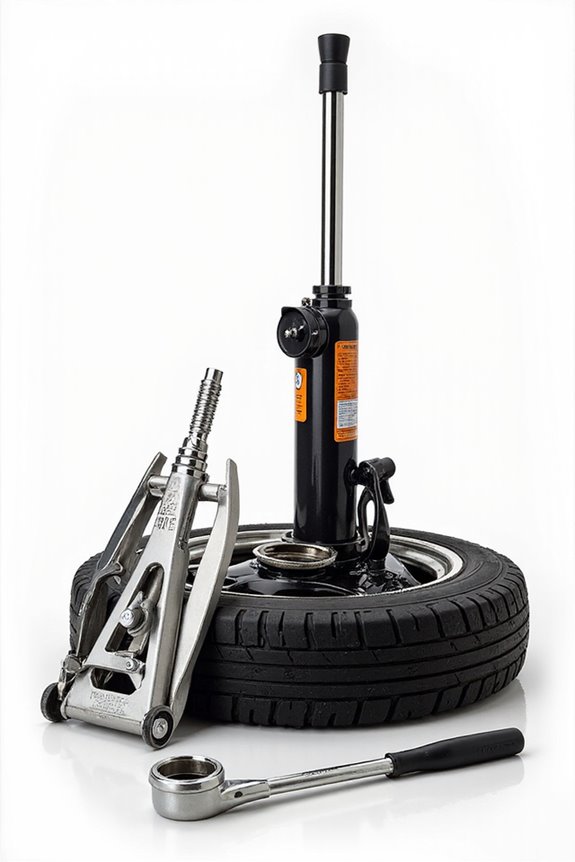
Gathering the right tools and equipment is key when it comes to tackling a flat tire. To guarantee our tool selection is spot on, let’s gather a robust car jack, a cross lug wrench, and a torque wrench. Don’t forget a spare tire and a tire repair kit for those minor emergencies.
Now, equipment organization is just as vital. We can store everything neatly in the trunk, using durable cases for our repair kit, so it’s easy to access. Also, consider adding gloves and a flashlight for safety and visibility. Additionally, ensuring that your vehicle’s tools are in working condition can enhance HVAC performance and overall safety during roadside emergencies.
Takeaway: Having the essential tools organized makes our tire-changing experience smoother and safer. Let’s gear up for this task together!
Inspecting the Surroundings
Before we plunge into changing that flat tire, let’s take a moment to inspect our surroundings. It’s essential to assess any surrounding hazards, like slopes or sharp objects, that could lead to injuries. We should aim for a flat, stable surface, far away from traffic, ensuring our vehicle visibility to other drivers by activating those hazard lights.
Let’s also think about lighting—working in dim conditions can be tricky, so make sure we’ve got a reliable light source handy. And if it’s rainy or icy out, we might want to reconsider our timing. We want this process to be smooth and safe, so taking a moment here will help us avoid any surprises down the road. Additionally, using a car power inverter can be beneficial to charge devices while waiting for assistance if needed.
Takeaway: Safety first, always!
Loosening Lug Nuts

Let’s tackle those lug nuts and get this tire-changing process underway! First, let’s verify the vehicle’s on level ground with the parking brake engaged—safety first! We’ll use our lug wrench, positioning it firmly on the nut, employing proper techniques to avoid stripping. If some nuts resist, let’s overcome that resistance with steady pressure instead of sudden jerks. It’s smart to loosen them in a star pattern; this way, we help avoid any damage.
If they’re stubborn due to rust, don’t fret! A bit of penetrating oil can work wonders. Let’s gently tap the nuts if needed, and if that doesn’t quite cut it, we can increase our leverage using a pipe over the wrench handle. Proper installation practices ensure that we maintain safety and efficiency during the entire process. We’ve got this!
Removing the Flat Tire
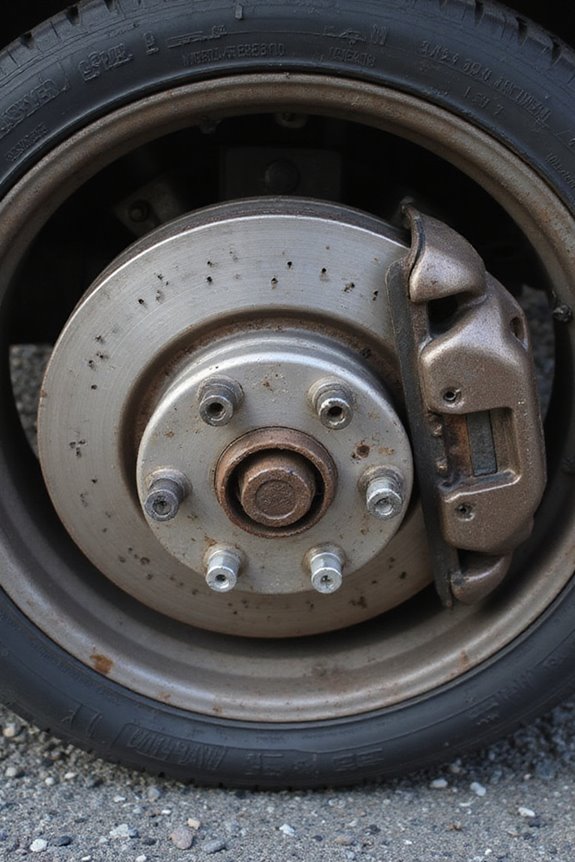
With the lug nuts finally free, we’re ready to tackle the next step: removing that pesky flat tire. First, let’s grip the tire firmly, pulling it straight off the wheel studs. It’s important to handle the tire carefully to avoid any injury or damage to nearby components. Once it’s free, let’s place that flat tire flat on the ground or at the rear of the vehicle—keeping it well out of traffic’s way.
Before we move on, let’s take a quick peek at the wheel studs. A little inspection for cleanliness or damage now goes a long way in ensuring vehicle stability when we install the spare. Additionally, ensuring that the wheel studs’ condition is optimal can help prevent issues during future tire changes and enhance safety on the road. So, let’s make sure we’re set for the next steps ahead!
Installing the Spare Tire
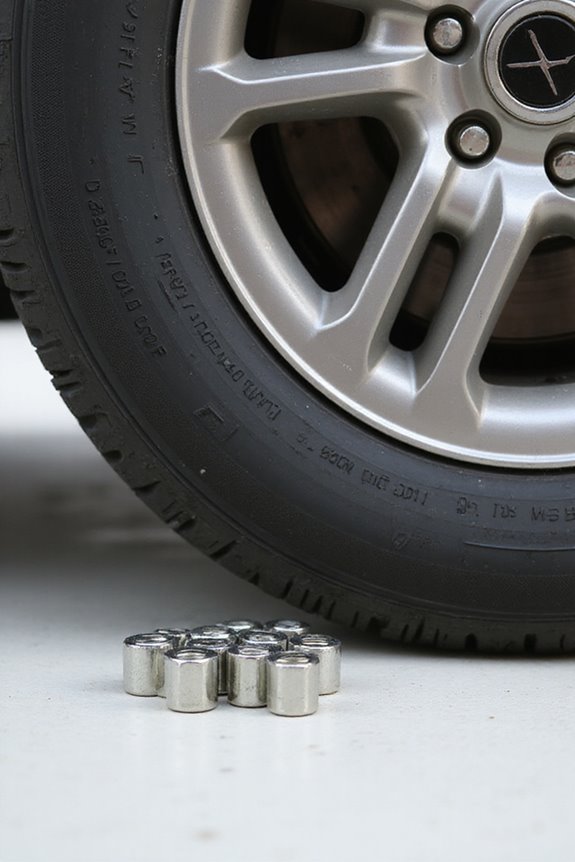
After removing that flat tire, it’s time to get the spare into action. First, let’s position the spare tire. We’ll align those holes with the wheel studs—simple enough! Just make certain the air valve faces out for easy access later. Next, we should support the tire, keeping it steady and avoiding any dropped moments. If the spare feels heavy, take it easy and avoid rapid movements.
Once aligned, we hand-tighten the lug nuts onto the studs. Remember, no need for full torque just yet; we want to confirm the spare tire alignment is secure, without any risk of cross-threading. Routine inspections of battery cables can also be important for overall vehicle maintenance. Take a deep breath, we’re on the right track to getting back on the road!
Tightening the Lug Nuts
Tightening those lug nuts properly is essential for ensuring our spare tire holds up under pressure. We’ll follow a star pattern for our tightening techniques, which means we’ll skip adjacent lug nuts and work diagonally. This method distributes pressure evenly, keeping our wheel secure and preventing it from warping.
First, we’ll finger-tighten each lug nut to avoid cross-threading. Once that’s done, we lower the vehicle so the tire just touches the ground for stability. Using a calibrated torque wrench, we tighten in multiple passes, stopping when it clicks. Remember, attention to details like avoiding over-torquing is key here—nobody wants a broken stud, right?
Takeaway: Don’t skip the star pattern; it’s vital for our safety!
Post-Installation Steps
Once the spare tire is in place and those lug nuts are tightly secured, we can’t forget the essential post-installation steps that guarantee our safety and readiness to hit the road again. Let’s run through our post-installation checklist together:
- Lower the Vehicle: Slowly lower it using the jack, then store it properly.
- Final Tightening: Re-check those lug nuts for tightness and torque.
- Tire Pressure: Inspect and adjust the spare tire’s pressure to the manufacturer’s specifications.
- Clean-Up: Pack away our tools, ensuring the area around the wheel hub is clear.
- Safety Checks: Confirm everything’s functioning well, from the tires to those safety lights.
Additional Safety and Preparedness Tips
No one wants to find themselves stranded on the roadside, struggling with a flat tire, but being prepared can help us handle such situations with confidence. Regular tire maintenance is our first defense—let’s check tread depth, inflate tires correctly, and rotate them to guarantee safety. Remember, tire pressure monitoring systems are our friends; we should understand their signals.
Safety Education Tips:
- Always keep a proper jack, lug wrench, and spare tire in the vehicle.
- Move off the road when changing a tire, using hazard lights for visibility.
- If unsure or in danger, stay inside our car with seatbelts fastened.
Takeaway: By staying prepared, we can turn an intimidating situation into a manageable one.
Frequently Asked Questions
What Should I Do if I Don’T Have a Spare Tire?
When we find ourselves without a spare tire, let’s consider calling roadside assistance or using a tire repair kit. Remember, these fixes are temporary—professional help is our best friend for a lasting solution.
Can I Drive on a Flat Tire to a Service Station?
No, we shouldn’t drive on a flat tire to a service station. It can worsen damage and cost us more. Let’s explore tire repair options instead, ensuring our safety and minimizing expensive repairs down the road.
How Do I Know if My Spare Tire Is Safe to Use?
Did you know 30% of spare tires are unsafe? To guarantee spare tire safety, let’s check tire pressure regularly, inspect for damage, and confirm they’re securely mounted. Together, we’ll drive with confidence when emergencies arise!
What if the Lug Nuts Are Too Tight to Loosen?
If lug nuts are too tight to loosen, we can use an impact wrench for quick, effective force. Let’s guarantee we apply lubricant first, giving it time to work so we don’t damage anything.
Is There a Specific Order for Changing Tires on a Vehicle?
Yes, there’s a specific tire changing sequence we should follow. By applying proper vehicle lifting techniques and ensuring safety measures, we can make the process smoother and less stressful. Let’s tackle it step by step together!

